Showing posts with label buttons. Show all posts

Friday, May 25, 2012

Shopping finds brings inspiration to craft

hey! i scored some good deals and fun items while shopping around.


dont you hate when you are "just going to the store for 2 things... ONLY 2 THINGS!" and come back with bags of other stuff... i hate it too. but i can never pass up a great deal. and i happened to run into a few this week. for the first time ever (that i have seen at least) walmart had all red tag clearance items store wide for an additional 50% off!
so here i share with you my bounty:

I have been wanting to make the perfect doggie treat jar for some time now but have never found a jar that "feels right" for the job. all the ones i have seen were too small, too expensive, or didnt seal well. and whats the point of getting a food storage jar if it doesnt seal well. especially since the texan summer brings out buggies in full force!


Well as i was just killing some time browsing around big lots i found this jar which just SCREAMED doggie jar to me. it seals so good it is actually a bit hard to open. it is (as you can see) a good size. it is thick glass (anchor brand). and best of all:
it only cost $5
i grabbed it up real quick! im even debating of checking back for some more because i like it so much.
as soon as i took it out of the bag the pups inspected it... i sure they knew it was meant for their goodies


walmart had a bunch of ribbons and trims on clearance for $1. i filled my arms with cute ribbons and then realized i still have a TON of ribbon that i haven't used. so i only grabbed these trim and thin black rick rack.


at big lots i found 3 bottles of green and 1 bottle of pink fabric paint as well as 1 green puffy paint all 4oz and all for $1 each. i cant wait to start playing with fabric paint!


 i have been wanting to make a dry erase board from picture frames since i have seen it all over pinterest... but i dont have any good unused picture frames at home and all the ones for sale were too expensive for this project. i came by this one at walmart for $3 and thought id give it a go. i will be going back for 1 more now that i know i love it!
(i want to make one for the kitchen with: "wants, needs, and on sale" to help keep my grocery list updated and organized for my monetary availability.


i saw this courduroy print in colorful elephants and light paisley pattern for $2 a yard at walmart. i could already picture a cute vest! so i grabbed 1.5 yards because i just know i will want to make something else with it


as you may already know, i am a bit button obsessed. walmart had these bags on clearance for $1 each. i snagged up 2 princess themed, some minis, and some pretty colors


and i got these little individual buttons for dirt cheap! they will make adorable rings!


here is my super cute upcycled picture frame dry erase board. it is hanging conveniently over my desk. i hope it helps me keep organized because my work and school life is about to kick into super high gear!


and here are some pics of the 4 individual sides of my doggie treat jar:
front: WHO WANTS A SNACK?
my pups react to the word "snack". i have always used that instead of treat. you should hear them come running from all ends of the house when i say the "S" word


the left side belongs to thea. it has a sun because she has always been my sunshine (i do sing "you are my sunshine" to her often).


the back side says PAWS OFF... im sure i do not need to explain lol


and the right side belongs to penny. she has a bat because she has always been my "fatty batty". when i had barely brought her home she was a roly poly! (just like roly form 101 dalmations) and when her ears go up and fangs come out she looks like a bat lol...


still trying to picture penelope the bat??
here you go
my fatty batty


now to get ready for a new fleamarket adventure tomorrow...
xoxoxoxox
sunkissed lily bean
<3

Thursday, May 17, 2012

Pregnancy Package for a dear friend

Hey! I had been working on a care package for my friend who is expecting her second baby, 1st son. She is now 35 weeks and received her package today. I am so excited to hear what she thinks of everything.
While shopping for her baby boy, her little girl became obsessed with dinosaurs and trains and wanted to have clothes with these things as well. She was having to buy boy's shirts for her. So I got to work and painted up a girly dino shirt.


 when my uncle saw what i was doing, he jumped on board and made a girly dino pendant. i love the goofy teeth!
 i made this button plaque for the baby to be. i really like how it came out!
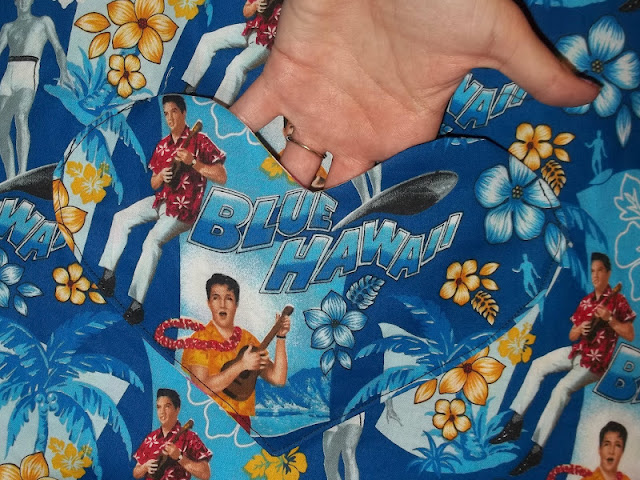
 and i made my friend this awesome reversible Elvis tote.
I am more than happy with how this came out and a bit jealous that i only got enough fabric to make one.
 i put heart shaped pockets on each side


 she had also ordered a diaper bag from me. she left it all in my hands and let me run with any idea. i decided the dino theme would be perfect for both kids. i added a huge pocket with a flap to the front
 inside i put 2 elastic bands to hold bottles or sippy cups.
as you can see the inside is quite roomy. great for toting around the needs of 2 munchkins
 here is a close-up of the super cool fabric


in other news, i got to hang out with my twin the other night.
she had gone with me to get my candle tattoo and then we ran around town a bit.
we ended up hanging out back at my house.
we baked some super yummy cupcakes
 and we played arts and crafts and made sister turtle bracelets
aren't they super cute

i love being off school!
xoxox
Lily Bean

Saturday, February 25, 2012

ready for spring! button ring tutorial

Hello my lovelies! I think I definitely got my crafting mojo back yesterday! i knocked out a few projects that have been sitting half-done for months in my sewing area. i can't wait to share them all with you! but even more exciting is that i made a tutorial... hooray! I haven't made one in a while and i really do love sharing any crafty knowledge, tips, and tricks i know with you all

so now i bring you: my button ring tutorial
this project is super quick and simple

all you need:
some braided elastic
needle & thread
fun buttons
glue (if button has a shank)

choose the buttons you want to layer on your ring.
I chose these 2 sets with topper buttons that had a shank
and this set with buttons that all had sewing holes in them
 for those of you who don't know, the ring on the bottom of buttons used to sew it on is called a shank. i had no idea when i first started my button obsession. 
 i used some wire cutters to remove the shanks from my daisy and sunglasses
 after you trim you may still have some rough edges. depending on how flat you need the top button to lay you may  be able to ignore this.
 next step is measuring out your elastic. be sure to get snug on your finger but not to the point of stretching the ellastic. let it overlap a bit and then cut
 sew up both ends of the elastic. at this point ALWAYS try the elastic ring on to be sure it fits right. its a terrible feeling when you have sewn and glued all your buttons down and the ring is too big or too small
sew your main button onto the elastic positioning it over the overlapped elastic
 you are almost done
 here are my base buttons sewn on 
if you are layering more buttons that can be sewn on then you will just continue sewing a few rounds until both buttons are secure 
 this ring has 3 layers of buttons that can be sewn. i just added the topper once the middle was secure and sewed a few more rounds until they were all secure.
 then you can tie off your thread
 for the other 2 rings, i had the daisy and sunglasses to be the topper. i needed the sunglasses to lie flat, so i used a dremel to sand down the rest of the shank
 see, much smoother now
 glue the toppers on and enjoy your awesome new button rings

i would love to see the rings you come up with!
xoxoxox
Lily Bean