Saturday, February 26, 2011

My super awesome reversible purse...

FINALLY... i get to post about the purse I made. It is my own design and pattern so I am pretty proud about pulling this off. Here is my step by step:

I cut all the pieces out for each side of the purse


I fused the pieces to light interfacing.


I sewed all 4 of the pockets, right sides together. Leave 2" to flip right sides out.


When you first flip they look very poofy.


To push out the corners you can buy a fancy tool or you can use a wire hanger... push gentle enough that you dont bust open a seam but firm enough that your corners are straight and not rounded.


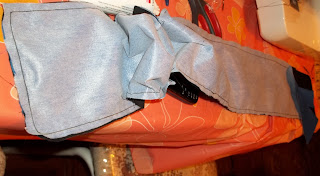
Next I sewed the shoulder strap, right sides together.Time to flip the strap... This can be tricky but once you got it down you are good. Again, you can buy a fancy tool or you can modify a wire hanger.


Push the wire hanger through the strap and hook it over one side.


It takes some maneuvering and getting used to but before you know it, it's flipped.


Time to sew the piece that will become the width of the purse. Pin in place.


You will need to have the handle in place in between the pieces for the width. You will notice that the handle is much shorter than the width so you will only be able to match up 1 side at a time.


You will sew the edge that is matched up with the strap and one full side length and the other side length about 3/4. The you will need to pull the strap to the top of the unsewn side, which will scrunch the sewn side up.


Match up to the edge to pin in place.


Sew the rest of the width, leaving 3" to flip right sides out.


Flip the width right sides out. It's easy if you pull the strap through. 


Next I pinned the pockets in place on the right sides of the front panels.


Sew the 3 sides of each pocket. Using a hand needle thread the loose end to the backside of the panel.


Tie the loose ends together on the back side of the panel.


Now your front panels should look like this:


Next I pinned the front panels together. For the key-fob connection I used a fabric loop. You can also use a ribbon.


Pin the loop in place towards the side of the panel, at least 1" or more away from the edge.


You will do the same when pinning the back/flap panel together, pinning a fabric loop to the bottom center of the flap for the botton.


Sew and flip both panels. You should then have the 3 main pieces of the purse.


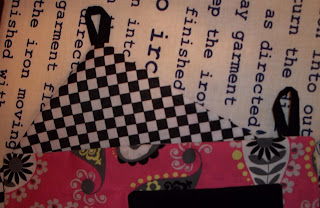
Your fabric loops should look like this.


Pin one panel to the middle piece.


Sew in place and then repeat with the other panel.


Now it's time for the details. Sew your buttons in place on each side.


The finished purse is perfect for notebooks and such.
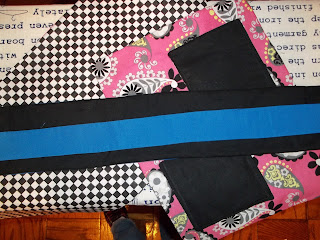
Here is one view: blue with chekers


and the other side: black with pink paisley


dont forget to connect a key fob or carabiner to keep your keys accesible not matter how much stuff you put in your purse.


Phew... My longest post yet! I seeeeew enjoyed it and hope you did too <3

Thursday, February 24, 2011

To be continued...

I am tired and can no longer spell right, so tomorrow I will post the long awaited reversible messenger purse tutorial

sweet dreams

Snack Size Reusable Bag

Here is a mini version of the sandwich sized bag...


Sandwich Sized Reusable Snack Bag

I made a reusable snack bag using 2 fabric scraps and iron on vinyl.


Cut the vinyl whichever size you want your bag. I traced a ziploc sandwich size bag and added 1/4" seam allowance. Then iron the vinly onto your lining fabric following the instructions on the vinyl package.
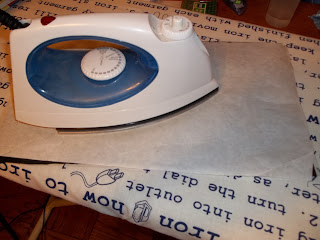
*Do not use steam... Keep your iron dry*


I also ironed the other side of the lining fabric to ensure vinly was fused completely.
This is how your lining will look when you are done.


Next, pin your lining and your exterior fabric right sides together and sew leaving a 3" opening to turn your bag later.


Next, flip your bag right sides out. I recommend heating the vinly first because it will move much easier when heated.
Fold you snack bag in half and iron to set the vinly in shape.


Cut both sides of your velcro and pin in place. I pinned 1" from the top. Sew around the egdes to secure your vinyl.


Close your bag and then sew up both sides.


View of the inside
I use mine for cookies and such. I would put veggies, cookies, crackers, and things of that type. I personally would not put a mustardy bologna or PBJ sandwich.
You can wipe clean but do not wash in your machine or submerge in water.

Cosmetic Pouch

Here is a tutorial for the cosmetic bag I made. I did not follow a pattern or online tutorial. I flipped my store-purchsed cosmetic bag inside out and studied it until I understood what I need to do. I used a 5 inch zipper and a fabric scrap... Here goes:

I gathered my rotary cutter, rotary cutting mat, fabric, and ruler

I cut a rectangle 7 1/2" x 11"

Fold 1/2" on a short edge and pin your zipper in place
Sew the zipper on the first side. Then fold 1/2", pin, and sew the zipper on the second side. This will take some manuevering so that you sew a straight line on a tube shape using your machine.
I recommend sewing with the zipper closed so your bag works right when you are done.

This is what it should look like when you are done sewing both sides of the zipper and you flip the bag to check the way it looks.
 Pin each side of the bag and sew down the right and left sides. I always use a 1/4" seam.
1 side sewn, 1 side pinned

Measure 1" down the seams on the bottom corners. Mark the edge with pins so you will know where to sew. 


 Sew a straight line making triangles on each bottom corner.

 When you have done both side the bottom should look pinnched, like so:
 Flip your bag right sides out and you will see the bottom has taken form.
 Now you have the area on the top sides that the zipper doesn't cover. At this point i recommend opening the zipper enough to get your finger in to open it later.
 With the bag inside out, measure from where the zipper ends to 1 1/2 inches away at the edge (again creating a triangle).
Mark the end point with a pin.

Sew the right and left top corners. Then you can wiggle the zipper open and flip your bag right side out.


tah-dah!