
howdy! well my weekend turned out to be a bit busier than i had planned but i am here to post the tutorial i promised before it becomes even more delayed.
so here you have it: my tank top recon dress <3
all it takes is a tank top, some elastic, and enough fabric to wrap around you and be as long as you'd like. i used a yard of fabric to go with my "delicious" tank top.

Put your tank top on and decide where you want it to become the bottom of the dress. Do consider about half an inch for seam allowance. Have a friend help you or go to a mirror and pinch up where you want to cut.

make a small snip to mark your spot

get your elastic and wrap it around your body at the level of the snip. cut to fit with an extra 1/2 inch to overlap and sew.

next you will measure from the cut down to the length you would like your dress. add 2 1/2 inches for seam allowance and hem. (icut my fabric 20 inches long). remove your tank top and cut straight across the tank top where you marked. you can get more technical measuring your "straight" line prior to cutting. i prefer to eyeball for this project.

next you will want to measure around your widest part (usually your hips or bum) add 3 inches for seam allowance and ease. you can add more if you want it a bit more billowy but i don't suggest adding less. my bottom measured 37" so i cut my fabric 40" wide

fold your fabric WRONG sides together and pin in place

sew together. trim as close to your seam as you safely can

fold over the seam and iron flat RIGHT sides together

pin and sew again to enclose your seam (this is a French seam). iron 1/2 an inch over on the top edge.

get your elastic and sew a zig-zag to join the ends. i like to line up the seams but since you won't see the elastic it does n ot make any difference.
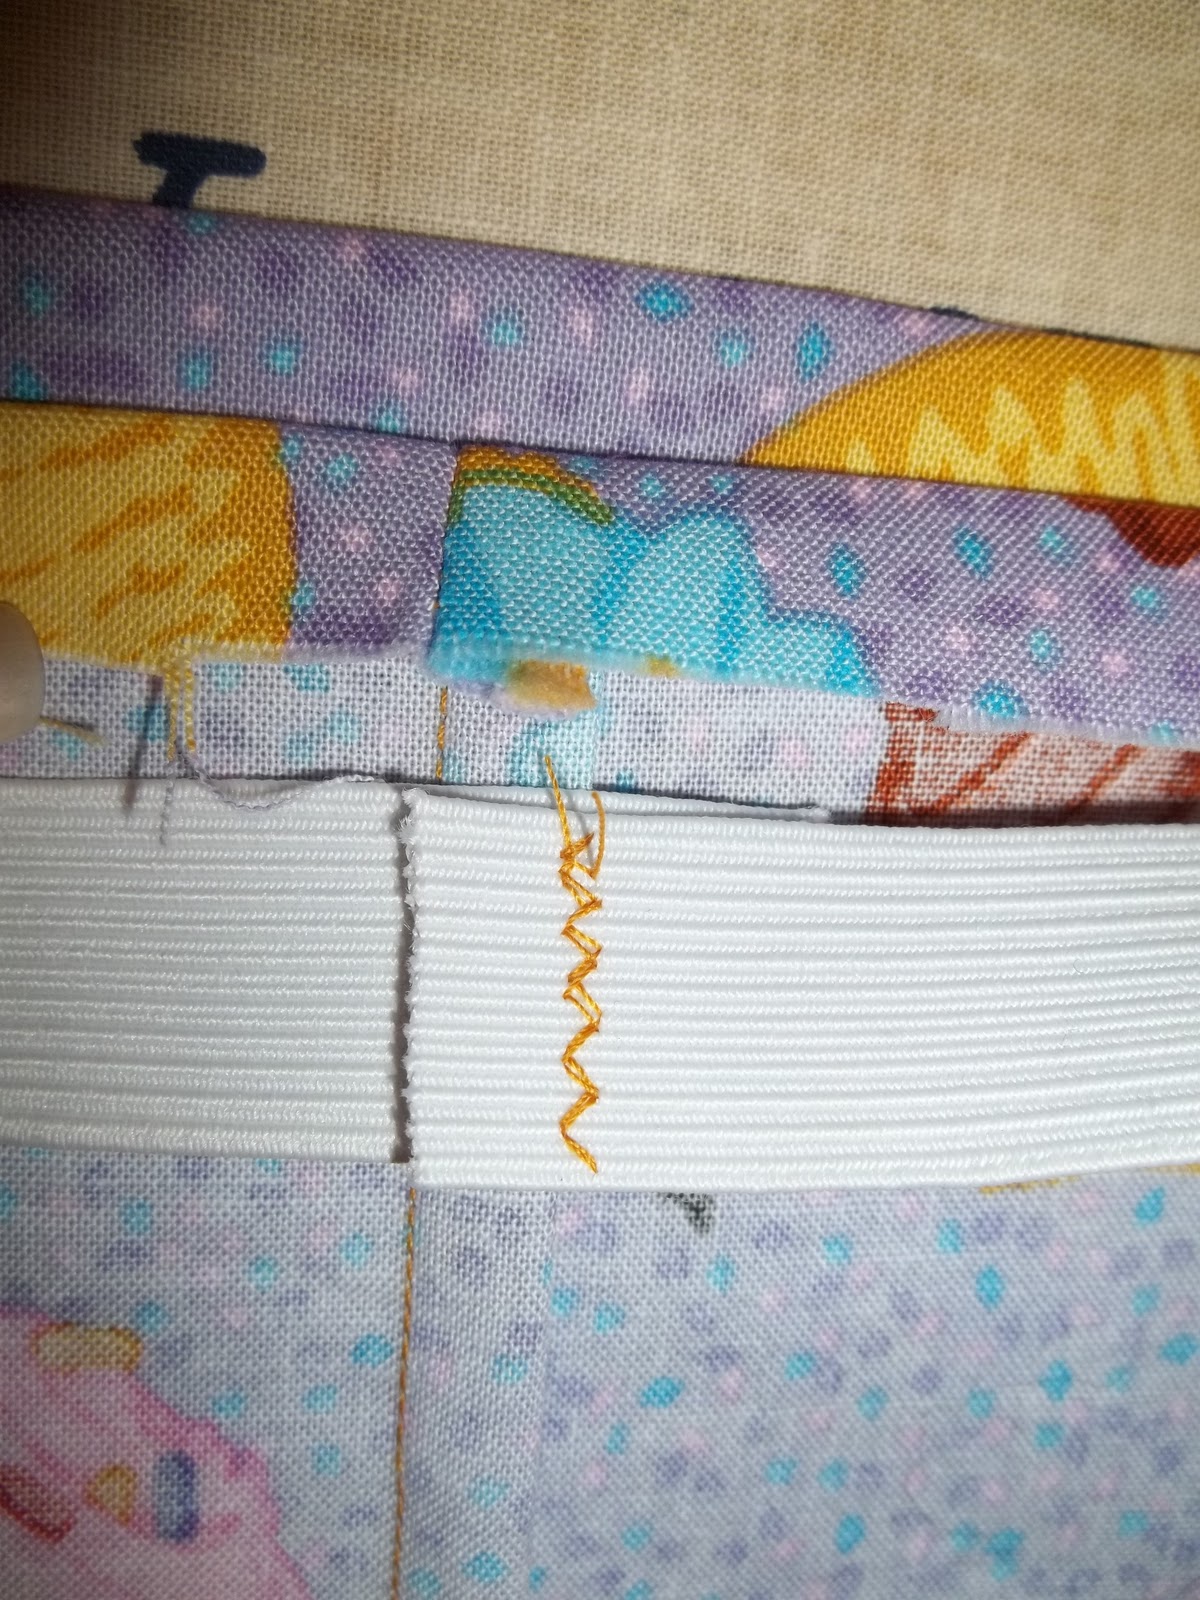
tuck your tshirt into the skirt with the RIGHT sides together. i like to keep the elastic on the outside because it will be easier to control when sewing. be sure to line up the back of the shirt with the seam of the skirt. pin at the center back. then find the center front of all 3 layers and pin. continue around the piece finding the center between 2 pins until you feel you have enough for control while sewing. i have 8 pins

when sewing the elastic on, the trick is to be sure to keep all 3 layers lined up and stretch all 3 layers taut. sew with a zig zag stitch all the way around.

your stitch should look like this on the inside...

... and like this on the front

and here is an action shot to show how it sits so far. you will want to try it on before hemming to be sure that it is the right length prior to hemming it. now would be the time to add of take away.

i threw on my purple fabric belt to break up the pieces and it came together perfect.

at this point i would nromally finish the hem and then prance around in all my super-cute glory but i decided this dress was too adorable not to have a ruffle! so off i go on to the ruffles. you will need TWICE the full width of the skirt. since mine was 40 i cut 80 inches. you can cut it in more than 1 strip if necessary and sew them all together. decided how long you want to have your ruffle and add 1 inch for hem and seam allowance. i cut mine 3 1/2 inches tall.

connect the 2 pieces using a French seam (as describing above) fold and iron over 1/4 inch all around, then again 1/4 inch all around. this will feel like it take forever but will be so worth it.

sew the hem. your seams should look like this.

now comes the run part. this will feel tedious but again, so worth it. attach ruffle to dress WRONG sides together. you will pin in the same fashion as when you were attaching the top to the bottom. pin one side and then find the spot exactly across from it and pin. continue finding the spot exactly between 2 pins

when you are done pinning it will look something like this

now to sewing the ruffle on. as the "puff" of fabric approaches the foot, pinch the sides in to the center...

and fold down

hold flat until it is secure under the foot

it should look like this.

trim the edge near the seam, then fold over and carfully iron flat, pinning each ruffle down. THIS STEP IS IMPORTANT SO YOUR RUFFLES ARE NOT WONKY

sew all the way around.

your ruffle will be standing at attention

be sure to keep the seam down and fold the ruffle over to iron flat.

now you can prance around in all you super-cute glory

cupcakes and sprinkles!
xoxoxox
Lily Bean
No comments:
Post a Comment